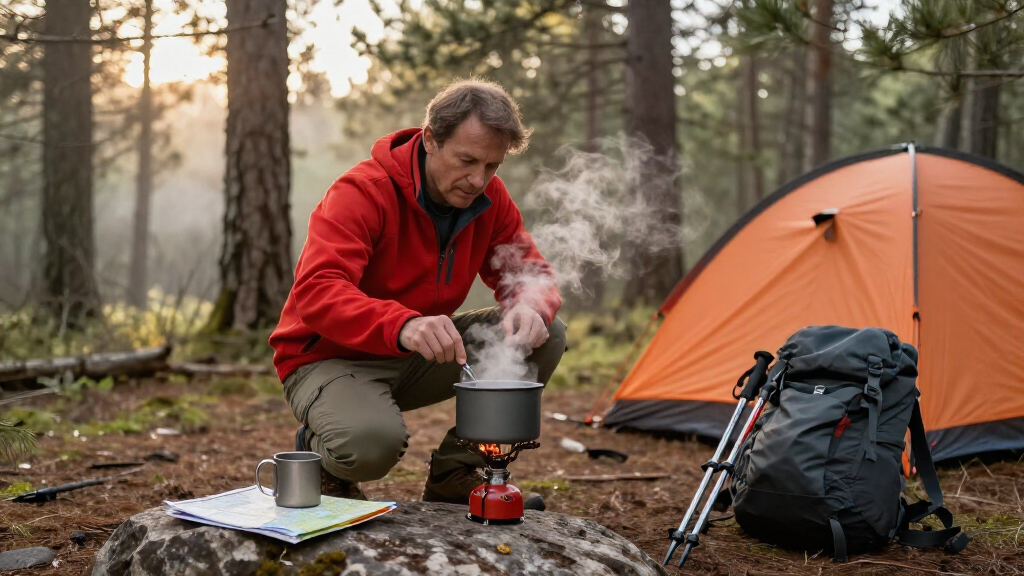

This guide walks you through the complete process of setting up and using a portable camping stove: choosing a safe location, connecting the fuel, lighting the burner, cooking a meal, and shutting everything down correctly. By the end, you will be able to run a canister or liquid-fuel backpacking stove from packed-away to packed-up without guesswork.

Get travel and outdoor gear delivered free with Prime
- Fast, free delivery on millions of items
- Prime Video, Amazon Music and more included
- Member-only deals all year

WADEO 7200W Windproof Camping Stove with Piezo Ignition
- ✔ Brand: WADEO
- ✔ Power: 7200 W
- ✔ Burners: Three brass burners

XtremepowerUS Double-Burner Propane Camping Stove
- ✔ Fuel type: LPG propane
- ✔ Number of burners: 2
- ✔ Total cooking power: 25,516 BTU

Gas One GS-3400P Dual-Fuel Portable Camping Stove
- ✔ Fuel types: Butane or propane
- ✔ Butane cartridge size: 8 oz
- ✔ Propane cylinder size: 16.4 oz
This guide is written for beginners and occasional campers using the two most common stove types: canister stoves (screw-on upright designs like the MSR PocketRocket or Coleman butane burners) and liquid-fuel stoves (pump-fed designs like the MSR WhisperLite). Most steps apply to both; where they differ, the guide says so explicitly. Expect your first full setup-and-cook cycle to take 20-30 minutes, and about 10 minutes once you have practiced.
Difficulty: Beginner | Time: 15-30 minutes
What You’ll Need
Tools & Materials:
- Portable camping stove (canister or liquid-fuel type)
- Fuel canister (isobutane/propane mix) or liquid fuel (white gas) as appropriate for your stove
- Matches, lighter, or piezo igniter
- Pot or pan with lid (1-2 liters is typical)
- Water for boiling and for safety
- Windscreen (built-in or separate foil type)
- Stable cooking surface: picnic table, flat rock, or packed dirt patch
- Small repair/maintenance kit (O-rings, jet-cleaning tool) if using a liquid-fuel stove
Knowledge:
- How to strike a match or operate a lighter safely
- Basic understanding that fuel canisters are pressurized and flammable
- Ability to identify wind direction and a stable, level surface
Read your stove’s manufacturer manual before your trip — jet sizes, priming procedures, and canister threading vary between brands. Practice the full setup once at home before you rely on the stove in the field.
WADEO 7200W Windproof Camping Stove with Piezo Ignition
The WADEO 7200W earns our top overall spot because it solves the two problems that ruin most campsite cooking: wind and slow boil times. Its windproof aluminum alloy cover wraps around three brass burners, meaning you are not huddling over the stove shielding the flame with your body. Compared with the Gas One GS-3400P, which has no windshield at all, this design alone justifies the pick for anyone cooking in exposed terrain.Fuel flexibility is the second differentiator. This stove accepts isobutane, butane, and 1 lb propane canisters via included adapters, which makes it far more forgiving than the XtremepowerUS, a strictly LPG-propane affair. The 50 cm hose also lets you set the canister away from the flame — a genuine safety advantage over integrated canister-top designs. At roughly 20 oz with a carry case included, it is dramatically more packable than the two-burner XtremepowerUS.The tradeoffs are real, though. You must keep the correct adapters organized and attached, and the manufacturer explicitly warns against sealing the windshield too tightly because the stove can overheat. Single-burner cooking also means one pot at a time — a dealbreaker for group meals that the XtremepowerUS handles with ease.
Pros:
- Windproof cover keeps the flame alive in exposed campsites
- Triple fuel compatibility covers nearly any canister you can buy
- Lightweight at around 20 oz with a carry case included
- Wide 5.91 in cooking area fits larger pots than typical backpacking stoves
Cons:
- Requires tracking compatible adapters for each fuel type
- Windshield cannot be fully sealed or the stove may overheat
- Single burner limits you to one pot at a time
Best for: Backpackers, solo travelers, and campers who frequently cook in windy, exposed conditions
Not ideal for: Families or groups who need to run two pots simultaneously at a base camp
Bottom line: The best all-around pick for portable cooking, especially where wind and weight matter more than burner count.
“The best all-around pick for portable cooking, especially where wind and weight matter more than burner count.”
XtremepowerUS Double-Burner Propane Camping Stove
The XtremepowerUS Double-Burner plays a different game than the other two picks. With two independently controlled burners producing a combined 25,516 BTU, it turns a campsite into a working kitchen — bacon on one side, pancakes on the other. Neither the WADEO nor the Gas One can replicate this, and that capability is the entire reason to buy it.The built-in piezo ignition on each burner means no matches, and the stainless steel surface wipes clean after a greasy breakfast, something brass-burner backpacking stoves handle far less gracefully. The included regulator and hose connect to standard LPG propane tanks, so setup is straightforward for anyone familiar with a backyard grill.But portability here is relative. At 27-1/2 inches wide, this is a stove for the trunk of a car, not a backpack — it is in a completely different weight class from the 20 oz WADEO. It also runs exclusively on propane, so if your trip plan involves butane canisters bought abroad or isobutane for a summit push, look elsewhere. It is outdoor-only by design, which rules out porch and emergency indoor use scenarios entirely.
Pros:
- Two independently controlled burners for cooking multiple dishes at once
- Built-in piezo ignition on both burners
- Combined 25,516 BTU handles large pots and high-heat cooking
- Stainless steel surface cleans up quickly after messy meals
Cons:
- Large footprint makes it car-camping only
- Runs exclusively on LPG propane
- Designed strictly for outdoor use
Best for: Car campers, tailgaters, and families who cook full meals for several people
Not ideal for: Backpackers or anyone who needs a stove that fits in a pack and accepts multiple fuel types
Bottom line: The clear choice when cooking capacity matters more than packability — a camp kitchen, not a backpacking stove.
“The clear choice when cooking capacity matters more than packability — a camp kitchen, not a backpacking stove.”
Gas One GS-3400P Dual-Fuel Portable Camping Stove
The Gas One GS-3400P is the easiest stove in this lineup to live with. It runs on either an 8 oz butane cartridge or a 16.4 oz propane cylinder, with a converter regulator included, so fuel logistics rarely become a trip-ending problem. That dual-fuel flexibility matches the WADEO’s adaptability in practice, and beats the propane-only XtremepowerUS for resupply flexibility.Where this stove genuinely separates itself is safety engineering. The built-in pressure sensor, cartridge ejection system, and butane gas flow cutoff are features neither competitor offers. If a cartridge overheats or malfunctions, the stove ejects it and cuts the gas — a meaningful difference for cautious campers, families, or anyone new to canister stoves.The compromises are straightforward. It is a single burner, so like the WADEO you are cooking one pot at a time, and it lacks any wind protection, which gives the WADEO a real edge in bad weather. Fuel is not included, so budget for your first cartridge. Power output is also more modest than the WADEO’s 7200 W triple-burner array, meaning slower boils when you are racing the weather.
Pros:
- Dual-fuel design accepts both butane and propane canisters
- Automatic piezo-electric ignition starts instantly
- Adjustable dial gives precise low-simmer to high-heat control
- Pressure sensor and cartridge ejection system add real safety margins
Cons:
- No wind protection around the burner
- Fuel canister not included
- Single burner with modest power compared to the WADEO
Best for: Budget-conscious campers, beginners, and safety-focused families who want one simple, dependable stove
Not ideal for: High-speed cooking in wind, or groups needing multiple burners
Bottom line: The smartest value pick — unmatched safety features and fuel flexibility in a simple, affordable package.
“The smartest value pick — unmatched safety features and fuel flexibility in a simple, affordable package.”
As an Amazon Associate we earn from qualifying purchases.
Before You Start
Safety context before you light anything:
- Cook outside only. Portable camping stoves produce carbon monoxide and open flames. Never use one inside a tent, vestibule, vehicle, or enclosed shelter, even one that seems well ventilated.
- Check the stove before your trip. Inspect the fuel line, O-rings, and burner head for cracks, and confirm the control valve turns smoothly.
- Know your fuel type. Isobutane canisters (screw-thread EN417) do not attach to liquid-fuel stoves and vice versa. Using the wrong fuel is dangerous and can damage the stove.
- Pick your spot thoughtfully. You need a flat, stable surface at least 3 meters (10 feet) from your tent, dry grass, overhanging branches, and anything flammable. In wildfire-prone areas, check local fire restrictions before operating any stove.
Step-by-Step Instructions
Step 1: Find and prepare a stable cooking location
Set up your cook area on a flat, level, non-flammable surface such as a picnic table, bare dirt, gravel, or a flat rock. Clear a radius of about 1 meter around the spot of dry leaves, pine needles, and grass clippings. Note the wind direction and position yourself so the wind hits your back, not the burner or your hands.
Tip:If the ground is uneven, place the stove on a small cutting board or flat piece of wood to create a stable base. A stove that tips with a pot of boiling water on it is the most common cause of camp kitchen burns.
Check: The stove sits level, does not wobble when you press lightly on its edge, and nothing flammable is within arm’s reach of the burner.
Step 2: Attach the fuel canister or fill and pressurize the tank
For canister stoves: Confirm the stove’s control valve is fully closed (turned clockwise until it stops). Screw the stove onto the canister by hand only — thread it on straight, and stop when it is snug and resistant. Never use pliers or tools to tighten.
For liquid-fuel stoves: Fill the fuel bottle no more than three-quarters full with white gas, screw on the pump assembly, and pump 15-20 strokes to pressurize. Attach the fuel line to the stove according to your manual.
Tip:Before attaching a canister stove, check the canister’s rubber seal and the stove’s O-ring for cracks or debris. A damaged seal will leak gas the moment you open the valve.
Check: Canister: the stove is hand-tight with no hissing sound and no smell of gas. Liquid fuel: the bottle holds pressure and the fuel line clicks or seats firmly into place.
Step 3: Position the windscreen and pot supports
Open or unfold the pot supports so they are fully locked in place, then set up your windscreen around (but not touching) the stove, leaving a 2-3 cm gap for airflow. If using a foil windscreen with a canister stove, do not wrap it so tightly that it traps heat against the canister.
Tip:Wind is the biggest enemy of stove efficiency — it can cut heat output roughly in half and make lighting difficult. Even a light breeze justifies a windscreen.
Check: The pot supports do not fold or flex under light finger pressure, and the windscreen blocks wind without touching the burner or canister.
Step 4: Light the stove
Hold your match or lighter near the burner head (never directly over it), then slowly open the control valve a quarter turn counterclockwise. The gas should ignite within a second or two with a soft whoosh. Adjust the valve until you have a steady blue flame with minimal orange at the tips.
Liquid-fuel stoves only: These stoves require priming. Open the valve briefly to let a small amount of fuel into the priming cup, close it, and light the priming fuel. Wait for the flame to nearly die down and the burner to heat up, then slowly open the valve again — the stove will catch with a steady hissing flame.
Tip:Open the valve slowly. Cranking it open quickly produces a flare-up, especially with liquid-fuel stoves. Keep your face and hands to the side of the burner, never above it.
Check: A steady blue flame burns with no sputtering, no yellow flare, and no smell of unburned fuel.
Step 5: Boil water and cook your meal
Place your pot of water or food on the pot supports, centered so the weight is balanced. Put the lid on to speed boiling. One liter of water at a moderate flame typically boils in 3-5 minutes in calm conditions. Stir food regularly and adjust the valve down once water boils — you rarely need full power to maintain a rolling boil or simmer.
Tip:Full blast wastes fuel and scorches food. For simmering, turn the flame down until it just covers the bottom of the pot. If your stove simmers poorly, a heat diffuser or rotating the pot every minute helps.
Check: Water reaches a rolling boil within the expected time, and food cooks without burning on the bottom.
Step 6: Shut down the stove safely
Remove the pot and set it on a heat-safe surface. Turn the control valve fully clockwise until the flame goes out and the valve stops. For canister stoves, wait 2-3 minutes for the burner to cool, then unscrew the stove from the canister. For liquid-fuel stoves, release the pressure in the fuel bottle using the pump’s release valve, then disconnect the fuel line.
Tip:Never disconnect fuel while the burner is still hot enough to ignite residual vapor, and never pack a stove that is warm — melted gear and burns result.
Check: The flame is completely out, the valve is closed tight, and after cooling, the stove and fuel separate without hissing or spraying.
Step 7: Clean and pack the stove
Wipe soot off the burner head and pot supports with a damp cloth, let all parts dry completely, and pack the stove in its case or stuff sack. Store the fuel canister or bottle upright in a cool spot away from direct sunlight and food. Pack out empty canisters unless your campsite has a metal recycling program that accepts them.
Tip:A quick wipe-down after every use prevents soot buildup in the jet and sticky valve operation later.
Check: Everything is dry, cool, and stowed; no fuel smell remains in your pack or food bag.
Common Mistakes to Avoid
- Overtightening the stove onto the canister with pliers or tools — Hand-tighten only. Tools deform the threads and O-ring, causing leaks that get worse with each use.
- Opening the fuel valve too quickly when lighting — Open the valve a quarter turn slowly while holding the flame source to the side of the burner. Quick opening causes flare-ups that can singe hair and hands.
- Cooking inside a tent or vestibule to escape wind or rain — Always cook outside. Carbon monoxide buildup in enclosed spaces can be fatal within minutes, even with the door open. Use a tarp or cook under a picnic shelter instead.
- Placing the stove on an uneven or soft surface — Test stability by pressing the edge of the stove before lighting. Use a flat board or rock base, and keep the pot centered on the supports.
Troubleshooting
Problem: The stove will not light, or the flame keeps going out
Solution: Check that the fuel canister is not empty (shake it — a full canister has noticeable liquid sloshing) and that the valve is open at least a quarter turn. If gas flows but ignition fails, replace wet matches or a dead lighter. In wind, improve the windscreen placement and shield the burner with your body while lighting.
Problem: The flame is weak, sputtering, or mostly yellow
Solution: Weak or yellow flames usually mean a partially clogged jet or cold fuel. Let the canister warm in your jacket for 10 minutes if temperatures are near freezing (never warm it over a fire). If the problem persists, clean the jet with the tool supplied in your stove’s maintenance kit, following the manual.
Problem: Gas hisses when you attach or detach the canister
Solution: A brief faint hiss during attachment is normal; continuous hissing means the valve is open or the seal is damaged. Close the valve fully, detach, and inspect the canister’s rubber seal and the stove’s O-ring. Replace damaged parts before using the stove again.
Problem: Liquid-fuel stove flares up violently during priming
Solution: You used too much priming fuel. Extinguish by closing the valve and waiting for the flame to die. On the next attempt, use a smaller squirt of fuel, and open the main valve only after the priming flame has nearly extinguished and the burner is hot.
What Success Looks Like
You have completed the task correctly when: (1) the stove lit on the first or second attempt with a steady blue flame, (2) your water boiled or food cooked fully without scorching, (3) the flame extinguished completely when you closed the valve, (4) all parts were cool, clean, and dry before packing, and (5) no fuel smell or hissing occurred at any connection point. If you achieved all five, your setup and shutdown routine are sound and ready to repeat.
Next Steps
After your trip, do three things. First, check how much fuel remains so you can gauge canister life for future outings — a rough rule is that a 230 g canister boils roughly 12-15 liters of water. Second, run the stove at home for one minute to verify it still works before your next trip; stoves that fail tend to fail at the start of a season. Third, if your stove sees heavy use, order a maintenance kit (O-rings, jet, lubricant) and service it once a year. When a canister finally runs empty, check whether your local recycling center accepts punctured canisters before throwing it in the trash.
Frequently Asked Questions
How do I know how much fuel is left in my canister?
Shake it near your ear — liquid fuel sloshing indicates remaining fuel. For a more accurate reading, weigh the canister on a small kitchen scale and subtract the empty weight printed on the label. Many campers mark the empty weight on the canister with a marker at purchase.
Can I use my canister stove in cold weather?
Standard isobutane canisters perform poorly below roughly -5°C (23°F) because pressure drops with temperature. For cold trips, keep the canister warm inside your jacket until use, or choose a stove with an inverted-canister or liquid-fuel design, which handles cold far better.
Is it safe to use a camping stove under a tarp or awning?
Yes, provided the tarp is at least 1.5 meters above the flame and open on at least two sides for ventilation. Never cook inside a tent, and secure tarps so wind cannot blow fabric down onto the burner.
Why does my pot take so much longer to boil than the stove’s advertised time?
Advertised boil times assume ideal lab conditions: no wind, room-temperature water, a lid, and a full canister. Wind is the usual culprit — add a proper windscreen and a lid, start with water kept at ambient temperature, and expect real-world times 30-50% longer than advertised.
Halloween Picks
halloween
As an affiliate, we earn on qualifying purchases.